自动化零信任设备健康检查

1
2
3
4
5
6
7
8
9
10
11
12
13
14
15
16
17
18
19
20
21
22
23
24
25
26
27
28
29
30
31
32
function Get-DeviceCompliance {
[CmdletBinding()]
param(
[Parameter(Mandatory=$true)]
[string]$ComputerName
)

# 验证TPM状态
$tpmStatus = Get-Tpm -ComputerName $ComputerName -ErrorAction SilentlyContinue
# 检查BitLocker加密状态
$bitlocker = Get-BitLockerVolume -MountPoint $env:SystemDrive -ErrorAction SilentlyContinue
# 获取防病毒状态
$avStatus = Get-MpComputerStatus -ErrorAction SilentlyContinue

[PSCustomObject]@{
ComputerName = $ComputerName
TPMEnabled = $tpmStatus.TpmPresent
SecureBoot = (Confirm-SecureBootUEFI).SecureBootEnabled
BitLockerStatus = $bitlocker.VolumeStatus
AntivirusEnabled = $avStatus.AMServiceEnabled
LastUpdate = (Get-HotFix | Sort-Object InstalledOn -Descending | Select-Object -First 1).InstalledOn
}
}

# 执行企业终端健康检查
$devices = 'PC001','PC002','PC003'
$report = $devices | ForEach-Object {
Get-DeviceCompliance -ComputerName $_ -Verbose
}

# 生成合规性报告
$report | Export-Csv -Path "ZeroTrust_Compliance_Report_$(Get-Date -Format yyyyMMdd).csv" -NoTypeInformation

本脚本实现以下零信任核心检查项:

  1. TPM芯片启用状态验证
  2. Secure Boot安全启动配置
  3. 系统盘BitLocker加密状态
  4. 防病毒实时监控状态
  5. 系统最后更新日期

扩展建议:

  • 与Azure AD条件访问策略集成
  • 添加自动修复功能
  • 实现实时监控告警机制

PowerShell 技能连载 - 安全策略配置指南

PowerShell执行策略是脚本安全的第一道防线,通过灵活配置平衡功能与安全。

1
2
3
4
5
# 查看当前执行策略
Get-ExecutionPolicy -List

# 设置远程签名策略
Set-ExecutionPolicy RemoteSigned -Scope CurrentUser

脚本签名验证

  1. 创建代码签名证书:
1
2
3
4
5
6
7
$certParams = @{
Subject = 'CN=PowerShell Scripts'
Type = 'CodeSigning'
KeyUsage = 'DigitalSignature'
KeyLength = 2048
}
$cert = New-SelfSignedCertificate @certParams
  1. 签名脚本文件:
1
2
3
4
5
6
$signParams = @{
Certificate = $cert
FilePath = 'script.ps1'
TimestampServer = 'http://timestamp.digicert.com'
}
Set-AuthenticodeSignature @signParams

安全日志分析

1
2
3
4
5
6
7
# 查询脚本块日志
Get-WinEvent -FilterHashtable @{
LogName = 'Microsoft-Windows-PowerShell/Operational'
Id = 4104
} | Where-Object {
$_.Message -match '可疑命令'
}

最佳实践:

  • 使用AllSigned策略生产环境
  • 定期轮换签名证书
  • 启用脚本块日志记录
  • 结合AppLocker增强控制

PowerShell 技能连载 - 红队渗透测试自动化框架

1
2
3
4
5
6
7
8
9
10
11
12
13
14
15
16
17
18
19
20
21
22
23
24
25
26
27
28
29
30
31
32
33
34
35
36
37
38
39
40
41
42
43
44
45
46
47
48
49
50
51
52
53
54
55
56
57
function Invoke-RedTeamScan {
[CmdletBinding()]
param(
[Parameter(Mandatory=$true)]
[string]$TargetRange,

[ValidateSet('Basic','Advanced')]
[string]$ScanMode = 'Basic'
)

$threatReport = [PSCustomObject]@{
Timestamp = Get-Date -Format 'yyyy-MM-dd HH:mm:ss'
VulnerableSystems = @()
AttackPaths = @()
RiskScore = 0
}

try {
# 检测本地权限提升漏洞
$localVulns = Get-ChildItem HKLM:\SOFTWARE\Microsoft\Windows\CurrentVersion\Uninstall |
Where-Object { $_.GetValue('DisplayName') -match '脆弱服务' }
if ($localVulns) {
$threatReport.VulnerableSystems += [PSCustomObject]@{
SystemName = $env:COMPUTERNAME
Vulnerability = '本地权限提升'
CVE = 'CVE-2024-XXXX'
}
}

# 高级模式横向移动检测
if ($ScanMode -eq 'Advanced') {
$networkSystems = Test-NetConnection -ComputerName $TargetRange -Port 445 |
Where-Object TcpTestSucceeded

$networkSystems | ForEach-Object {
$shares = Get-SmbShare -ComputerName $_.RemoteAddress -ErrorAction SilentlyContinue
if ($shares) {
$threatReport.AttackPaths += [PSCustomObject]@{
Source = $env:COMPUTERNAME
Target = $_.RemoteAddress
AttackVector = 'SMB共享漏洞'
}
}
}
}

# 计算风险评分
$threatReport.RiskScore = [math]::Min(100, ($threatReport.VulnerableSystems.Count * 30) + ($threatReport.AttackPaths.Count * 20))
}
catch {
Write-Error "渗透测试失败: $_"
}

# 生成红队行动报告
$threatReport | ConvertTo-Json | Out-File -Path "$env:TEMP/RedTeamReport_$(Get-Date -Format yyyyMMdd).json"
return $threatReport
}

核心功能

  1. 本地权限提升漏洞检测
  2. 网络横向移动路径分析
  3. SMB共享漏洞自动化扫描
  4. 动态风险评分系统

应用场景

  • 红队渗透测试演练
  • 企业网络安全评估
  • 攻击路径可视化
  • 安全防御策略验证

PowerShell 技能连载 - 零信任架构下的设备健康检查自动化

1
2
3
4
5
6
7
8
9
10
11
12
13
14
15
16
17
18
19
20
21
22
23
24
25
26
27
28
29
30
31
32
33
34
35
36
37
38
39
40
41
42
43
44
45
46
47
48
49
50
51
52
53
function Invoke-DeviceHealthCheck {
[CmdletBinding()]
param(
[Parameter(Mandatory=$true)]
[string]$DeviceName,

[ValidateSet('Basic','Full')]
[string]$ScanMode = 'Basic'
)

$complianceReport = [PSCustomObject]@{
Timestamp = Get-Date -Format 'yyyy-MM-dd HH:mm:ss'
DeviceName = $DeviceName
EncryptionStatus = $null
PatchLevel = $null
FirewallRules = @()
ComplianceScore = 0
}

try {
# 验证BitLocker加密状态
$encryptionStatus = Get-BitLockerVolume -MountPoint C: |
Select-Object -ExpandProperty EncryptionPercentage
$complianceReport.EncryptionStatus = $encryptionStatus -ge 100 ? 'Compliant' : 'Non-Compliant'

# 检查系统更新状态
$updates = Get-HotFix |
Where-Object InstalledOn -lt (Get-Date).AddDays(-30)
$complianceReport.PatchLevel = $updates.Count -eq 0 ? 'Current' : 'Outdated'

# 审计防火墙规则(完整扫描模式)
if ($ScanMode -eq 'Full') {
$firewallRules = Get-NetFirewallRule |
Where-Object Enabled -eq True |
Select-Object DisplayName, Direction, Action
$complianceReport.FirewallRules = $firewallRules
}

# 计算合规分数
$score = 0
if ($complianceReport.EncryptionStatus -eq 'Compliant') { $score += 40 }
if ($complianceReport.PatchLevel -eq 'Current') { $score += 30 }
if ($complianceReport.FirewallRules.Count -eq 0) { $score += 30 }
$complianceReport.ComplianceScore = $score
}
catch {
Write-Error "设备健康检查失败: $_"
}

# 生成零信任合规报告
$complianceReport | Export-Clixml -Path "$env:TEMP/${DeviceName}_ComplianceReport_$(Get-Date -Format yyyyMMdd).xml"
return $complianceReport
}

核心功能

  1. 自动化BitLocker加密状态验证
  2. 系统补丁级别智能评估
  3. 防火墙规则深度审计(完整扫描模式)
  4. 动态合规评分系统

应用场景

  • 零信任安全架构实施
  • 终端设备合规自动化审计
  • 安全基线动态验证
  • 监管合规报告生成

PowerShell 技能连载 - 零信任架构设备健康检查

1
2
3
4
5
6
7
8
9
10
11
12
13
14
15
16
17
18
19
20
21
22
23
24
25
26
27
28
29
30
31
32
33
34
35
36
37
38
39
40
41
42
43
44
45
46
47
48
49
50
51
function Invoke-DeviceHealthCheck {
[CmdletBinding()]
param(
[ValidateSet('Basic','Full')]
[string]$ScanLevel = 'Basic'
)

$healthReport = [PSCustomObject]@{
Timestamp = Get-Date -Format 'yyyy-MM-dd HH:mm:ss'
DeviceID = (Get-CimInstance -ClassName Win32_ComputerSystem).Name
Compliance = $true
SecurityScore = 100
Findings = @()
}

# 基础检查项
$checks = @(
{ Get-CimInstance -ClassName Win32_BIOS | Select-Object Version,ReleaseDate },
{ Get-WindowsUpdateLog -Last 7 | Where Status -ne 'Installed' },
{ Get-NetFirewallProfile | Where Enabled -eq $false }
)

if ($ScanLevel -eq 'Full') {
$checks += @(
{ Get-Service -Name WinDefend | Where Status -ne 'Running' },
{ Get-ChildItem 'C:\Temp' -Recurse -File | Where {$_.LastWriteTime -gt (Get-Date).AddDays(-1)} },
{ Get-LocalUser | Where PasswordNeverExpires -eq $true }
)
}

foreach ($check in $checks) {
try {
$result = & $check
if ($result) {
$healthReport.Findings += [PSCustomObject]@{
CheckName = $check.ToString().Split('{')[1].Trim()
Status = 'NonCompliant'
Details = $result | ConvertTo-Json -Compress
}
$healthReport.SecurityScore -= 10
$healthReport.Compliance = $false
}
}
catch {
Write-Warning "检查项执行失败: $_"
}
}

$healthReport | Export-Clixml -Path "$env:TEMP\DeviceHealthReport_$(Get-Date -Format yyyyMMdd).xml"
return $healthReport
}

核心功能

  1. 多层级设备健康扫描(基础/完整模式)
  2. 实时安全态势评分机制
  3. 自动化合规性验证
  4. XML格式审计报告生成

典型应用场景

  • 企业设备入网前合规检查
  • 零信任架构下的持续设备验证
  • 远程办公终端安全审计
  • 安全基线的快速验证

PowerShell 技能连载 - 软件供应链安全自动化审计

1
2
3
4
5
6
7
8
9
10
11
12
13
14
15
16
17
18
19
20
21
22
23
24
25
26
27
28
29
30
31
32
33
34
35
36
37
38
39
40
41
42
43
44
45
46
47
48
49
50
51
52
53
54
55
56
57
58
function Invoke-SupplyChainScan {
[CmdletBinding()]
param(
[Parameter(Mandatory=$true)]
[string]$ScanPath,

[ValidateSet('Critical','High','Medium','Low')]
[string]$SeverityLevel = 'Critical'
)

$report = [PSCustomObject]@{
Timestamp = Get-Date -Format 'yyyy-MM-dd HH:mm:ss'
ScannedComponents = @()
SecurityFindings = @()
}

# 组件哈希校验与签名验证
Get-ChildItem $ScanPath -Recurse -Include *.dll,*.exe,*.psm1 | ForEach-Object {
$fileHash = (Get-FileHash $_.FullName -Algorithm SHA256).Hash
$signature = Get-AuthenticodeSignature $_.FullName

$component = [PSCustomObject]@{
FileName = $_.Name
FilePath = $_.FullName
SHA256 = $fileHash
IsSigned = $signature.Status -eq 'Valid'
Publisher = $signature.SignerCertificate.Subject
}
$report.ScannedComponents += $component

if (-not $component.IsSigned) {
$report.SecurityFindings += [PSCustomObject]@{
Severity = 'High'
Description = "未签名的组件: $($_.Name)"
Recommendation = "要求供应商提供数字签名版本或验证组件来源"
}
}
}

# 依赖包漏洞扫描
$nugetPackages = Get-ChildItem $ScanPath -Recurse -Include packages.config
$nugetPackages | ForEach-Object {
[xml]$config = Get-Content $_.FullName
$config.packages.package | ForEach-Object {
$cveData = Invoke-RestMethod "https://api.cvecheck.org/v1/search?id=$($_.id)"
if ($cveData.vulnerabilities | Where-Object { $_.severity -ge $SeverityLevel }) {
$report.SecurityFindings += [PSCustomObject]@{
Severity = $SeverityLevel
Description = "存在漏洞的依赖包: $($_.id) v$($_.version)"
Recommendation = "升级到最新安全版本 $($cveData.latestVersion)"
}
}
}
}

$report | Export-Csv -Path "$ScanPath\SupplyChainReport_$(Get-Date -Format yyyyMMdd).csv" -NoTypeInformation
return $report
}

核心功能

  1. 软件组件哈希指纹校验
  2. 数字签名自动验证
  3. NuGet依赖包漏洞扫描
  4. CVE数据库集成查询

典型应用场景

  • 开发环境第三方组件安全检查
  • CI/CD流水线安全卡点
  • 供应商交付物合规验证
  • 企业软件资产安全基线报告

PowerShell实现供应链安全自动化扫描

1
2
3
4
5
6
7
8
9
10
11
12
13
14
15
16
17
18
19
20
21
22
23
24
25
26
27
function Invoke-ModuleVulnerabilityScan {
[CmdletBinding()]
param(
[Parameter(Mandatory=$true)]
[string]$ModuleName
)

# 获取模块版本信息
$module = Get-InstalledModule -Name $ModuleName -ErrorAction Stop

# 调用漏洞数据库API
$response = Invoke-RestMethod -Uri "https://vulndb.example.com/api/modules/$($module.Name)/$($module.Version)"

# 生成安全报告
[PSCustomObject]@{
ModuleName = $module.Name
Version = $module.Version
Vulnerabilities = $response.vulns.Count
Critical = $response.vulns | Where-Object { $_.severity -eq 'Critical' } | Measure-Object | Select-Object -Expand Count
LastUpdated = $module.PublishedDate
} | Export-Csv -Path "$env:TEMP\ModuleSecurityScan_$(Get-Date -Format yyyyMMdd).csv" -Append
}

# 扫描常用模块
'PSReadLine', 'Pester', 'Az' | ForEach-Object {
Invoke-ModuleVulnerabilityScan -ModuleName $_ -Verbose
}

核心功能:

  1. 自动化检测已安装PowerShell模块版本
  2. 对接漏洞数据库API进行安全检查
  3. 生成包含严重性等级的安全报告

扩展方向:

  1. 集成软件物料清单(SBOM)生成
  2. 添加自动补丁更新功能
  3. 与CI/CD流水线集成实现预发布扫描

用 PowerShell 重新打包 0day appz

从 0day 服务器下载下来的 appz 文件夹是这样的形态:

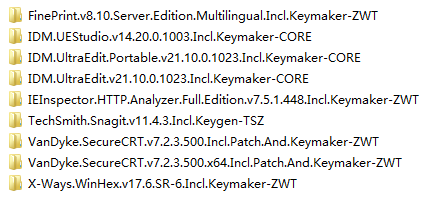
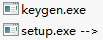
每个文件夹代表一个 appz 软件,打开是这个样子的:

里面是一系列 .zip 文件以及说明文件。这些 .zip 文件却不是使用 zip 的分卷压缩出来的,它们的内容如下:

要把这些 .zip 文件全部解压到同一个目录下,才可以得到一系列 rar 的分卷压缩文件。我们打开一个 .rar 文件,这才看到真正的内容:

软件数量大的时候,人工重复进行上述操作就不合适了。机械的劳动应该交给程序。我们可以设计一个 PowerShell 脚本,完成一系列功能:

  • 遍历 0day appz 的下载目录。
  • 解压所有 .zip 文件。
  • 解压 .rar 文件。
  • 将说明文件复制到一起。
  • 将最终的文件重打包为 .zip 文件。
  • 如果上述的解压有问题,则不打包,并输出错误日志。
  • 清理临时文件。
  • 清理成功的原始文件夹,保留失败的原始文件夹。

按照这个需求,我们可以编写如下 PowerShell 脚本:

$DebugPreference = 'Continue'

$incoming = 'd:\0day\incoming'
$temp1 = 'd:\0day\temp1'
$temp2 = 'd:\0day\temp2'
$output = 'd:\0day\output'

if (Test-Path $temp1) { del $temp1 -r }
if (Test-Path $temp2) { del $temp2 -r }

$apps = dir $incoming -Directory
$count = 0
$hasFailed = $false
$apps | foreach {
    $name = $_.Name
    Write-Progress -Activity 'Repacking apps' -PercentComplete ($count / $apps.Length * 100) -CurrentOperation $name
    echo "Repacking $name"

    md $temp1 | Out-Null
    md $temp2 | Out-Null

    # d:\0day\util\7z x -o"d:\0day\temp1" "d:\0day\incoming\VanDyke.SecureCRT.v7.2.2.491.Incl.Patch.And.Keymaker-ZWT\*.zip"
    $arguments = 'x', "-o""$temp1""", '-y', (Join-Path $_.FullName *.zip)
    .\7z $arguments | Out-Null

    if (!$?) {
        Write-Warning "Repacking $name failed."
        echo "$name" >> "$output\fail.log"

        del $temp1 -r
        del $temp2 -r

        $count++
        $hasFailed = $true
        return
    }

    # d:\0day\util\7z x -o"d:\0day\temp2" "d:\0day\temp1\*.rar" -y
    $arguments = 'x', "-o""$temp2""", '-y', "$temp1\*.rar"
    .\7z $arguments | Out-Null
    if (!$?) {
        Write-Warning "Repacking $name failed."
        echo "$name" >> "$output\fail.log"

        del $temp1 -r
        del $temp2 -r

        $count++
        $hasFailed = $true
        return
    }

    # copy d:\0day\temp1\*.diz d:\0day\temp2
    # copy d:\0day\temp1\*.nfo d:\0day\temp2

    dir $temp1 | where {
        $_.Extension -notmatch 'rar|r\d*'
    } | copy -Destination $temp2

    #d:\0day\util\7z a "d:\0day\output\VanDyke.SecureCRT.v7.2.2.491.Incl.Patch.And.Keymaker-ZWT.zip" "d:\0day\temp2\*.*" -r
    $arguments = 'a', "$output\$name.zip", "$temp2\*.*", '-r'
    .\7z $arguments | Out-Null
    if (!$?) {
        Write-Warning "Repacking $name failed."
        echo "$name" >> "$output\fail.log"

        del $temp1 -r
        del $temp2 -r

        $count++
        $hasFailed = $true
        return
    }

    del $temp1 -r
    del $temp2 -r

    Remove-Item -LiteralPath $_.FullName -r

    $count++
}

if ($hasFailed) {
    echo '' >> "$output\fail.log"
}

echo 'Press any key to continue...'
[Console]::ReadKey() | Out-Null

# del 'd:\0day\output\*.*' -r

您也可以在这里下载写好的脚本,包括完整的目录结构和 7z 软件包。请解压到 d:\ 中使用,或者自行调整脚本头部的路径。

在PowerShell中以管理员身份运行程序

对于已知的需要以管理员身份运行的命令,我们可以通过这个 Invoke-Admin 函数运行。这个函数确保以管理员身份运行一个程序。如果不是以管理员身份运行,则将弹出 UAC 对话框。

function Invoke-Admin() {
    param ( [string]$program = $(throw "Please specify a program" ),
            [string]$argumentString = "",
            [switch]$waitForExit )

    $psi = new-object "Diagnostics.ProcessStartInfo"
    $psi.FileName = $program
    $psi.Arguments = $argumentString
    $psi.Verb = "runas"
    $proc = [Diagnostics.Process]::Start($psi)
    if ( $waitForExit ) {
        $proc.WaitForExit();
    }
}

来源:Showing the UAC prompt in PowerShell if the action requires elevation

PowerShell 技术 QQ 群