PowerShell 技能连载 - Update PowerShell’s PSReadLine

Do you know the PSReadLine module? It’s included in PowerShell 5 and 7 by default, and this module is responsible for the convenient color coding in PowerShell consoles, among a number of additional benefits that makes handling code easier. PowerShell loads this module by default in console-based environments (it’s not being used in the PowerShell ISE).

To check the current version, run this:

PS> try { (Get-Module -Name PSReadLine).Version.ToString() } catch { Write-Warning 'PSReadLine not used in this host' }
2.1.0

The line either returns the current PSReadLine version used by your PowerShell host, or emits a warning that PSReadline isn’t used by your host (i.e. inside the PowerShell ISE host which takes care of color coding internally).

You should make sure you are using the latest version of PSReadline. This line would try and update it to the latest version:

PS> Update-Module -Name PSReadLine

Just in case you can’t update the module because it shipped with Windows, try and freshly install it like so:

PS> Install-Module -Name PSReadLine -Scope CurrentUser -Force

Make sure you relaunch PowerShell after you have updated PSReadLine to load the latest version.

PSReadLine comes with powerful new features such as “predictive IntelliSense” and dynamic help that are explained here: https://devblogs.microsoft.com/powershell/psreadline-2-2-ga/

ReTweet this Tip!
PowerShell 博客文章汇总 (2021-04 ~ 2022-03)

2021 年 04 月

2021 年 05 月

2021 年 06 月

2021 年 07 月

2021 年 08 月

2021 年 09 月

2021 年 10 月

2021 年 11 月

2021 年 12 月

2022 年

2022 年 01 月

2022 年 02 月

2022 年 03 月

PowerShell 技术互动社区发展状况(2022 年 3 月)

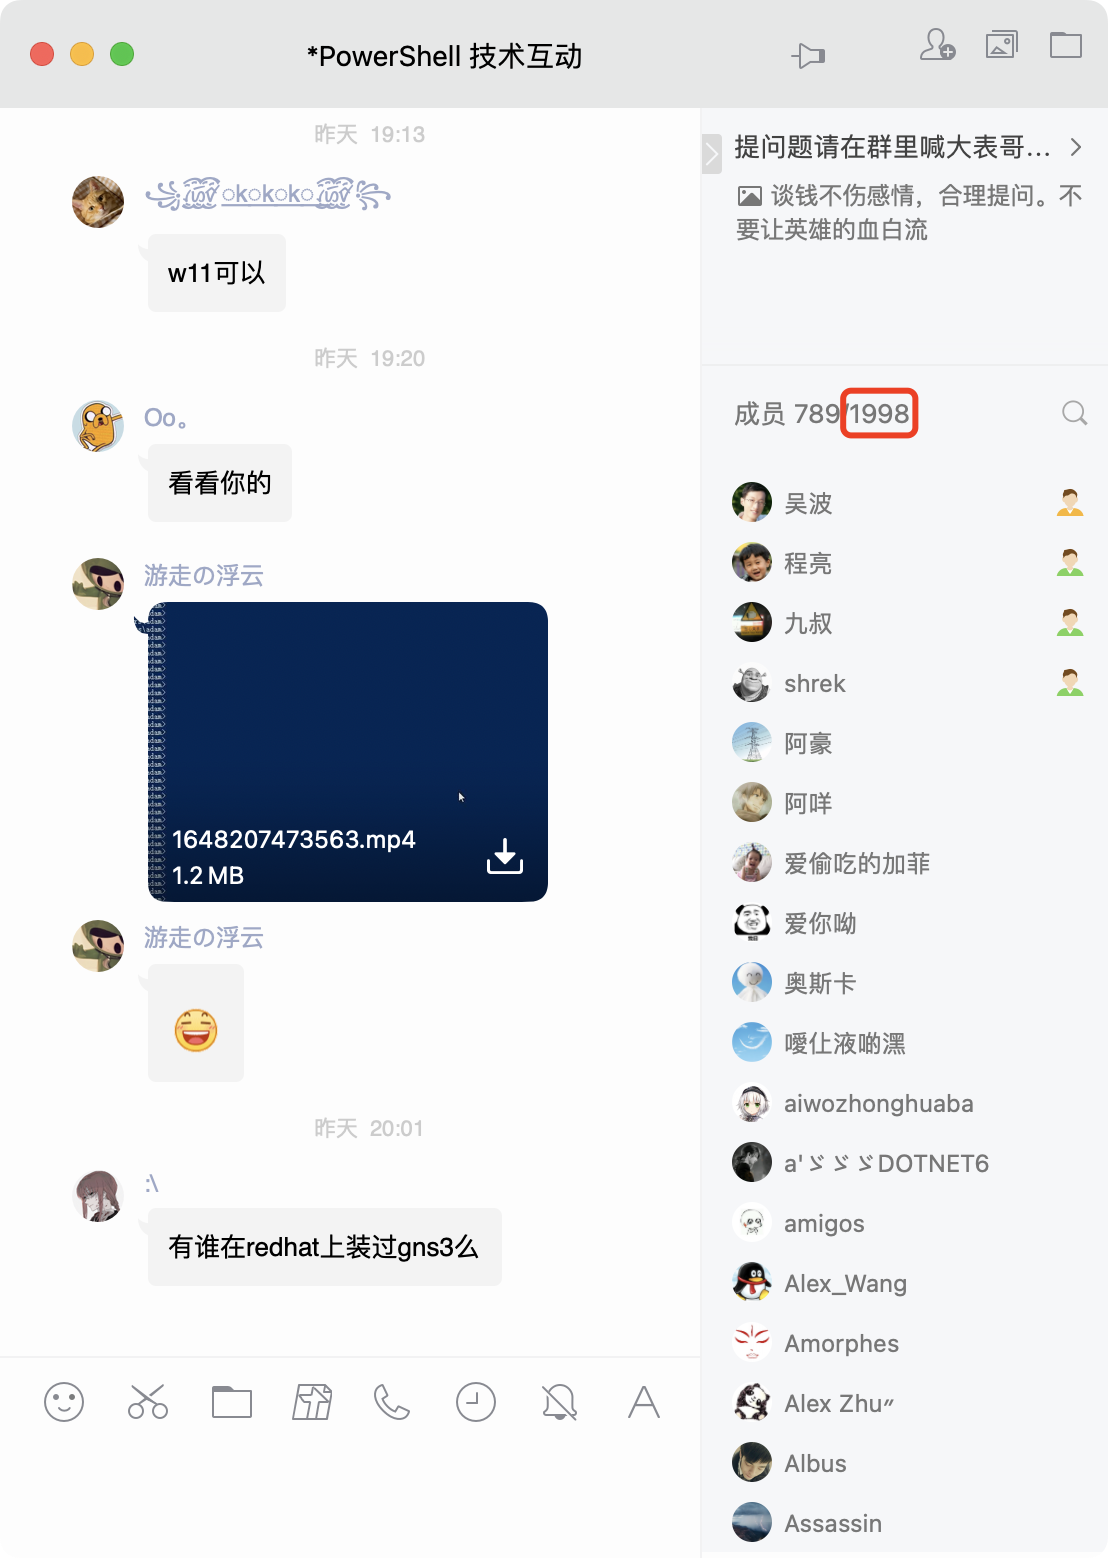
至 2022 年 3 月,“PowerShell 技术互动”社区人数已达到 1998 人,十分接近社区最大容量(2000 人),保持 PowerShell 最大中文社区的位置。根据腾讯社交平台的策略,社区人数的上限为 2000 人,我们会尽可能保留机会给活跃用户。

QQ Group

如您遇到 PowerShell 方面的技术问题,或有好的资源希望分享,请加入我们。QQ 群号:271143343

或者用手机 QQ 扫描二维码:

QR

PowerShell 技能连载 - 在 PowerShell 使用高效的列表

默认情况下,当您定义列表、命令返回多个结果或需要在变量中存储多个内容时,PowerShell 使用简单的“对象数组”。

默认对象数组是可以的,但是一旦你创建了它们,它们的容量就不能增长。如果仍然尝试使用 “+=“ 运算符,脚本可能会突然花费很长时间或永远不会完成:

1
2
3
4
5
6
7
8
9
10
# default array
$array = @()

1..100000 | ForEach-Object {
# += is actually creating a new array each time with one more entry
# this is very slow
$array += "adding $_"
}

$array.count

那是因为 “+=“ 其实是个谎言,PowerShell 实际上需要创建一个新的更大的数组并将内容从旧数组复制到新数组。如果只是几个元素,那么还好但是如果要添加的元素较多,就会导致指数级延迟。

最常见的解决方法是使用可以动态增长的 System.Collections.ArrayList 类型。您可以简单地将默认数组强制转换为这种类型。

这是一种常用的方法,速度更快:

1
2
3
4
5
6
7
8
9
10
# use a dynamically extensible array
$array = [System.Collections.ArrayList]@()

1..100000 | ForEach-Object {
# use the Add() method instead of "+="
# discard the return value provided by Add()
$null = $array.Add("adding $_")
}

$array.count

请注意它如何使用 Add() 方法而不是 “+=“ 运算符。

不过,System.Collections.ArrayList 有两个缺点:它的 Add() 方法返回添加新元素的位置,并且由于此信息没有意义,因此需要手动丢弃它,即将其分配给 $null。并且 ArrayLists 不是特定于类型的。它们可以存储任何数据类型,这使得它们虽然灵活但效率不高。

泛型列表要好得多,使用它们只是使用不同类型的问题。一方面,泛型列表可以限制为给定类型,因此它们可以以最有效的方式存储数据并提供类型安全。以下是字符串列表的示例:

1
2
3
4
5
6
7
8
9
10
# use a typed list for more efficiency
$array = [System.Collections.Generic.List[string]]@()

1..100000 | ForEach-Object {
# typed lists support Add() as well but there is no
# need to discard a return value
$array.Add("adding $_")
}

$array.count

如果您需要一个整形列表,只需替换泛型列表类型名称中的类型:

1
[System.Collections.Generic.List[int]]

强类型限制只是“可以”,而不是“必须”。如果您希望泛型列表与 ArrayList 一样灵活并接受任何类型,请使用 “object“ 类型:

1
[System.Collections.Generic.List[object]]

PowerShell 技能连载 - 从 Internet 下载文件

Invoke-WebRequest 不仅能向 web 服务发送请求。此 cmdlet 可以与远程系统通信并来回传输数据。这就是为什么您可以使用它以非常简单直接的方式从 Internet 下载文件:

1
2
3
4
5
6
7
$url = 'https://www.nasa.gov/sites/default/files/thumbnails/image/iss065e009613.jpg'
$destination = "$env:temp\picture_nasa.jpg"

Invoke-WebRequest -UseBasicParsing -Uri $url -OutFile $destination


Invoke-Item -Path $destination

第一部分下载 NASA 图片并将其保存在本地,下一部分在您的默认查看器中打开下载的图像。

请注意,Invoke-WebRequest 可能不适用于较旧的网络和 TLS 协议。

这里还有两点需要注意:

  • -UseBasicParsing 阻止 cmdlet 使用旧的和已弃用的 “Internet Explorer” 对象模型,这种方法在近期可能导致问题。使用 IE 库从网站解析原始 HTML 曾经很有用。
  • Invoke-WebRequest 有个大哥叫 Invoke-RestMethod。两者的工作方式相同,但 Invoke-RestMethod 会自动将下载的数据转换为正确的格式,即 XML 或 JSON。对于此处示例中的简单二进制下载,该方法没有帮助。

为《PowerShell 实战》撰序

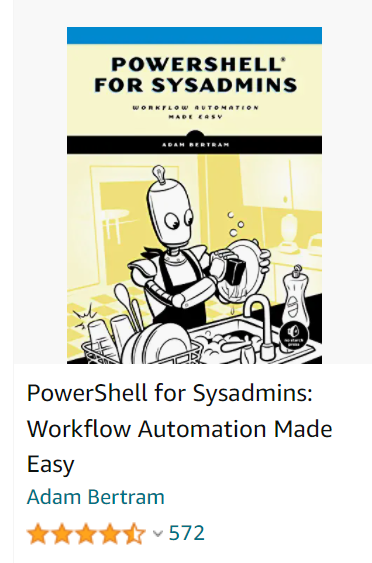
受人民邮电出版社图灵公司委托,为图灵即将在五月出版的《PowerShell 实战》(英文原版为 PowerShell for Sysadmins: Workflow Automation Made Easy)撰写序言。这是微软 MVP Adam Bertram 的大作,亚马逊评分 4.7 分。

PowerShell for Sysadmins: Workflow Automation Made Easy

以下是序言的全文。


推荐序

从 2016 年开始,细心的 Windows 10 用户发现,右键单击桌面的开始按钮,“命令提示符”选项不见了,取而代之的是 “Windows PowerShell”。这意味着存在多年的“小黑窗”遇到了变革。事实上,PowerShell 的第一个版本发布于 2006 年。作为新式的命令行 shell、脚本语言和配置管理框架,它已伴随我们走过 16 个年头。如今 PowerShell 已成为 Windows 高级用户、企业 IT 工程师、云服务管理员得心应手的利器。2016 年,开源及跨平台版推出后,PowerShell 在 Windows、Linux 和 macOS 平台上迎来了快速增长期,甚至使 Linux 用户成为 PowerShell 的核心用户。

PowerShell 之父 Jeffrey Snover 介绍了开发 PowerShell 项目的动机——主要是由于 Windows 和 Linux 核心架构的区别。在 Linux 上,一切管理操作的配置都是文本文件,因此所有的管理类软件其实就是处理文本文件的程序。而 Windows 其实是基于 API 的操作系统,所有的 API 返回的都是结构化的数据,因此那些 Unix 软件没什么帮助。这些需求推动了 PowerShell 的诞生。

从诞生之初,PowerShell 就具有一系列惊艳的特点。

  • 一致性的设计,语法、命名清晰明了。
  • 简单易学,能兼容现有的脚本程序和命令行工具。
  • 内置丰富的标准命令 (cmdlet),在默认环境下即可完成常见的系统管理工作。
  • 具备完整的扩展体系 (PowerShellGet)、庞大的模块和脚本市场 (PowerShell Gallery)。
  • 完整的强类型支持。它构建在 .NET CLR 基础之上,能接受并返回 .NET 对象。对象甚至能在管道和进程之间传递。
  • 最新的 PowerShell 7 是开源和跨平台的,其推动的不仅是一家企业的产品,而是整个行业。

伟大的设计必然对应宏大的叙事,理论上需要一部鸿篇巨著才能将诸多特性介绍清楚。而当出版社向我推荐这本《PowerShell 实战》(英文原版名为 _PowerShell for Sysadmins: Workflow Automation Made Easy_)时,粗略浏览目录后,我感到十分惊讶——作者是如何仅用区区 200 多页的篇幅,兼顾语法基础、操作实战,以至完成大型项目?带着浓浓的好奇心,我读完了整本书。

作者的写作思路是针对 IT 系统管理员完成日常管理任务这一核心目标,循序介绍必要的知识,以任务目标为导向带领读者逐步构建实用的脚本,穿插介绍有用的技巧、设计模式和最佳实践。对于有兴趣的读者,作者还给出了获取扩展资料的指引,这是一种友好的结构。全书分为三个部分,层层递进。第一部分用近全书一半的篇幅介绍 PowerShell 语法、远程处理功能、自动化测试框架,这是一切后续行动的基础。语法部分避免“回字有四种写法”的枯燥理论,例如只介绍 [CmdletBinding()] 高级函数的编写,但不再介绍基本函数。而对错误处理,则重点着墨,有利于培养技术人员良好的素养。第二部分带领读者完成管理报表、AD 管理、Azure 管理、AWS 管理等日常管理任务,让读者在理论学习和动手实践的结合中产生现实收益。第三部分带领读者构建一款名为 PowerLab 的 PowerShell 模块,不时地放慢脚步对代码进行重构整理,使脚本随时处于可阅读、可维护的最佳状态。无论是 PowerShell 新手、高级用户,还是 IT 运维人员,都能从中受益。

致敬原著者 Adam Bertram(微软 Cloud and Datacenter Management MVP)、中文版译者安道,愿本书为你开启奇妙的 PowerShell 之旅。

吴波

微软 Cloud and Datacenter Management MVP

PowerShell 技能连载 - Defender: 清空威胁列表和相关设置

默认情况下,Windows Defender 会在 15 天后自动清除它识别为威胁的项目。可以使用 PowerShell 直接配置此首选项以及许多其他首选项。只需确保启动提升权限的 PowerShell。

此示例查询清除间隔,然后设置新的清除时间间隔并对其进行验证:

1
2
3
4
5
6
7
PS> (Get-MpPreference).ScanPurgeItemsAfterDelay
15

PS> Set-MpPreference -ScanPurgeItemsAfterDelay 10

PS> (Get-MpPreference).ScanPurgeItemsAfterDelay
10

PowerShell 技能连载 - 复位防火墙策略

如果您想在 Windows 10 或 11 上将防火墙规则恢复为出厂默认设置,请让 PowerShell 运行相应的 netsh.exe 命令:

1
PS> netsh advfirewall reset

需要提升权限的 PowerShell。该命令将撤消自安装操作系统以来您(或安装程序)对 Windows 防火墙所做的任何更改。

PowerShell 技能连载 - 复位防火墙策略

如果您想在 Windows 10 或 11 上将防火墙规则恢复为出厂默认设置,请让 PowerShell 运行相应的 netsh.exe 命令:

1
PS> netsh advfirewall reset

需要提升权限的 PowerShell。该命令将撤消自安装操作系统以来您(或安装程序)对 Windows 防火墙所做的任何更改。

PowerShell 技能连载 - 管理 Bitlocker

最好确保笔记本上的本地驱动器已加密。这可以保护您的个人数据,以防有一天笔记本被盗或被丢入垃圾堆中。

大多数现代商务笔记本都配备 TPM 芯片并支持硬盘驱动器的实时加密。Windows 附带管理硬盘加密的 PowerShell 模块 “Bitlocker”:

1
2
3
4
5
6
7
8
9
10
11
12
13
14
15
16
17
18
PS> Get-Command -Module bitlocker

CommandType Name Version Source
----------- ---- ------- ------
Function Add-BitLockerKeyProtector 1.0.0.0 bitlocker
Function Backup-BitLockerKeyProtector 1.0.0.0 bitlocker
Function BackupToAAD-BitLockerKeyProtector 1.0.0.0 bitlocker
Function Clear-BitLockerAutoUnlock 1.0.0.0 bitlocker
Function Disable-BitLocker 1.0.0.0 bitlocker
Function Disable-BitLockerAutoUnlock 1.0.0.0 bitlocker
Function Enable-BitLocker 1.0.0.0 bitlocker
Function Enable-BitLockerAutoUnlock 1.0.0.0 bitlocker
Function Get-BitLockerVolume 1.0.0.0 bitlocker
Function Lock-BitLocker 1.0.0.0 bitlocker
Function Remove-BitLockerKeyProtector 1.0.0.0 bitlocker
Function Resume-BitLocker 1.0.0.0 bitlocker
Function Suspend-BitLocker 1.0.0.0 bitlocker
Function Unlock-BitLocker 1.0.0.0 bitlocker

确保在尝试任何这些命令之前启动提升权限的 PowerShell。例如,Get-BitlockerVolume 转储当前设置和保护状态:

1
2
3
4
5
6
7
8
9
10
11
12
13
14
15
16
17
PS> Get-BitLockerVolume | Select-Object -Property *


ComputerName : DELL7390
MountPoint : C:
EncryptionMethod : XtsAes128
AutoUnlockEnabled :
AutoUnlockKeyStored : False
MetadataVersion : 2
VolumeStatus : FullyEncrypted
ProtectionStatus : On
LockStatus : Unlocked
EncryptionPercentage : 100
WipePercentage : 0
VolumeType : OperatingSystem
CapacityGB : 938,0381
KeyProtector : {Tpm, RecoveryPassword}

该 cmdlet 显示当前的保护状态、采用的保护方法,EncryptionPercentage 指示加密是已完成还是仍在处理您的数据。

如果您的硬盘驱动器未加密,则应首先阅读有关 TPM 和加密的更多信息。虽然您可以使用 Enable-Bitlocker 开始加密您的硬盘驱动器,但重要的是您要完全了解所有加密原理,以免意外地把自己的电脑锁定。